
Tails is very useful if you want to be more anonymous by running everything through the tor network; but it is especially interesting for nomad activists who travel without a laptop of their own. This is because of the “Persistent Storage” feature.
If you setup a Persistent Storage on your Tails stick, you can keep all of your passwords, encryption keys, and other data on an encrypted partition of your Tails stick. This way you can travel without a laptop, and when you need to access your emails to write an important message to your family or organize with activists or supporters, you have all of your accounts directly on your Tails stick. You just need to borrow a laptop.
Unfortunately, many programs don’t work “out of the box” on Tails. For some it’s impossible, like Signal – because you can’t configure it to use Tor for talking to the Internet. For some other messengers you can find guides, e.g. Element or Wire. With Delta Chat it works quite well, it’s just a bit slower than running Delta Chat directly on a laptop or phone. These 5-6 steps should be enough to get it working for you:
Step 0: Start with Persistent Storage and Admin Password
If you don’t have a Persistent Storage yet, you can create it in the Welcome screen directly after booting the Tails stick by toggling the “Create Persistent Storage” button.
Also set an admin password at the + button in the bottom left, we will need it later.
Step 1: Enable Dotfiles and Persistent Folder
After starting Tails, you need to enable “Dotfiles” and “Persistent Folder” for Delta Chat to work as expected and store your data! Just run “Configure Persistent Storage” to do so:
Step 2: Download Delta Chat
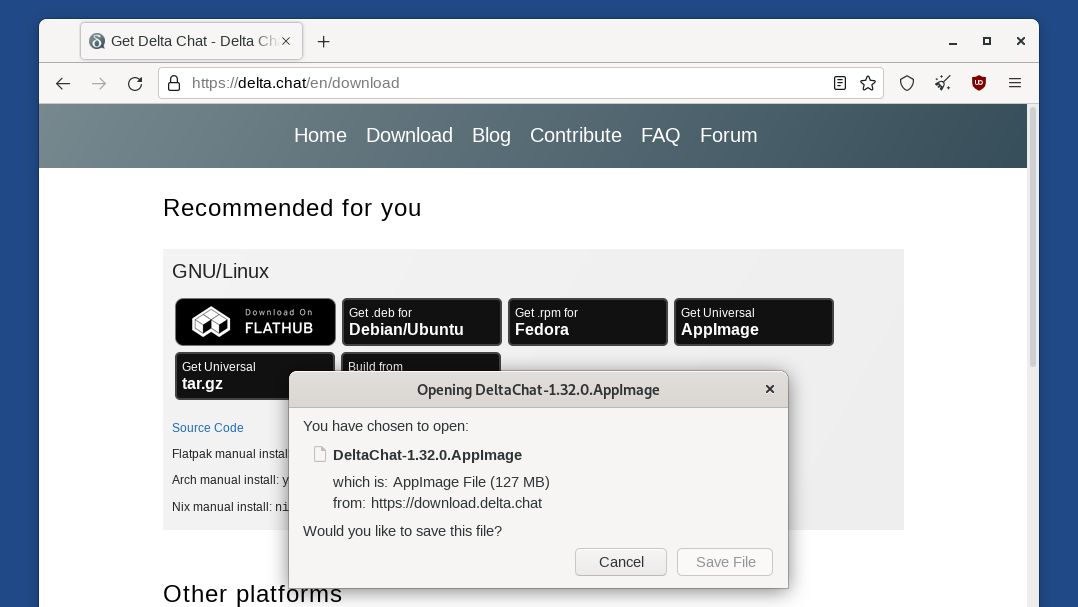
On get.delta.chat you can download the Linux Client. It’s available in different flavours: we need the 86_64 variant of the AppImage . It is hidden behind “download options without automated upgrades”.
AppImages have the advantage that we don’t need to install Delta Chat in Tails, which can be a bit annoying. We can just run it directly from the .AppImage file.
Best you save it to /home/amnesia/Persistent/, so you don’t need to download it every time you reboot Tails.
Step 3: Make the Config Folder Persistent
Delta Chat stores all its messages, encryption keys, account configuration, etc. in the /home/amnesia/.config/DeltaChat folder. Unfortunately even with a Persistent Volume we need to go an extra step to make it persistent. And for this we need the command line – don’t worry, you can’t break anything here. Maybe you learn something 🙂
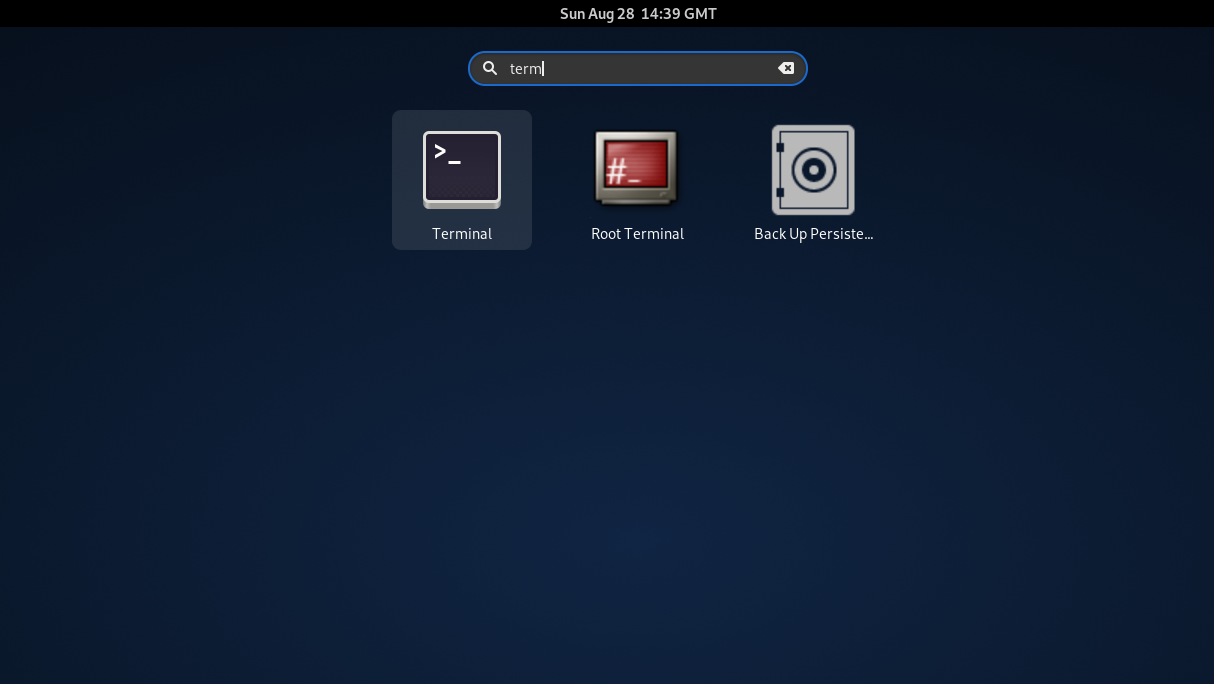
First we need to open a Terminal. Put your Mouse Pointer to the top left to open the application chooser, and search for “terminal” (we don’t need the Root Terminal for this step):
One note about the terminal: if you want to copy-paste commands from this article to the terminal, simply pressing ctrl + v will not work; you need to press ctrl + shift + v to paste into a terminal.
First, let’s check that the .config/DeltaChat folder is not created already. We start in the /home/amnesia folder, so we can check the content of .config with the following command:
ls -l .configIt shouldn’t be there yet… if there is a DeltaChat folder already, let’s move it to the Persistent part of Tails with:
mv .config/DeltaChat Persistent/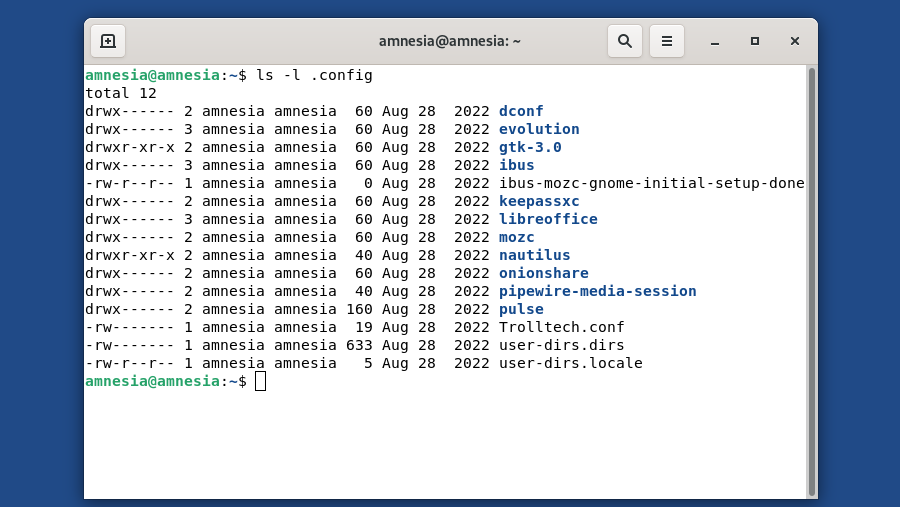
Then we need to create a link to the Persistent folder, so Delta Chat stores its data in the right location. To do this, run:
ln -s /home/amnesia/Persistent/DeltaChat .config/Don’t worry if the command line doesn’t give you a “success” message – as long as a command line doesn’t give you an error, it means it worked. We can check with ls -l .config whether it was successul: there should be a red entry with the link we just created.
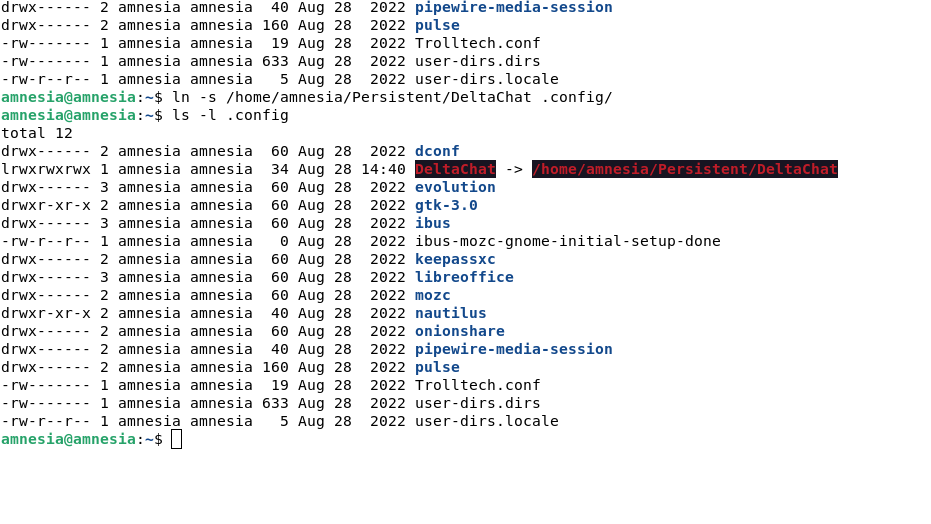
If it’s red, don’t worry, that just means that the link points to nowhere. So let’s just create an empty folder there. You can do this with:
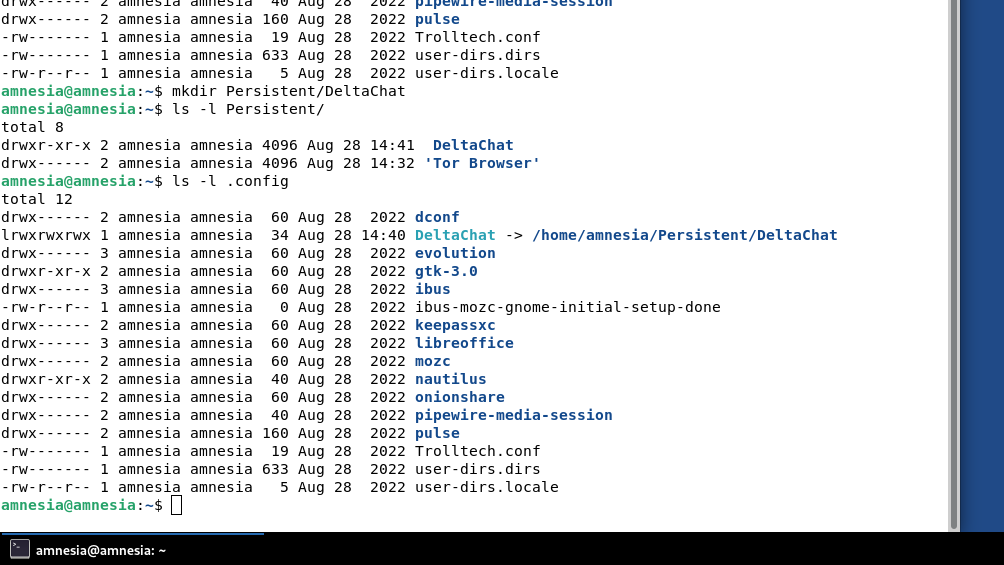
mkdir Persistent/DeltaChatNow ls -l .config should show a blue entry for the Delta Chat folder:
Now usually the link would be deleted when you restart Tails. We need to make this change persistent, so we don’t need to run this every time we start Tails. This should be accomplished by these two commands:
echo "ln -s /home/amnesia/Persistent/DeltaChat /home/amnesia/.config" >> ~/.profile
sudo cp -a ~/.profile /live/persistence/TailsData_*nlocked/dotfiles/
(The second command will ask you for the admin password you specified when you started Tails. Don’t be surprised if apart from that there is no output – this probably means they worked. To check whether they worked, reboot Tails and look if the link in .config still exists/was recreated successfully.)
Step 4: Run Delta Chat
Now we only need to make Delta Chat executable to run it. For this, we can use the following command (copy-paste it exactly like this so it works):
chmod u+x Persistent/DeltaChat*.AppImageYou can see whether it worked by looking if the filename is green when you run:
ls -l "Persistent/"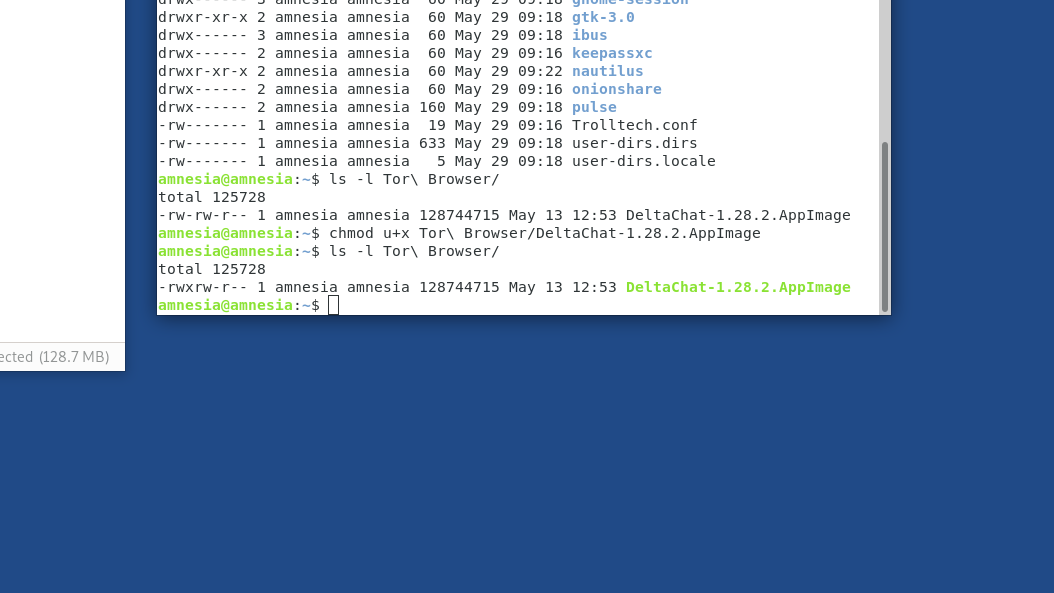
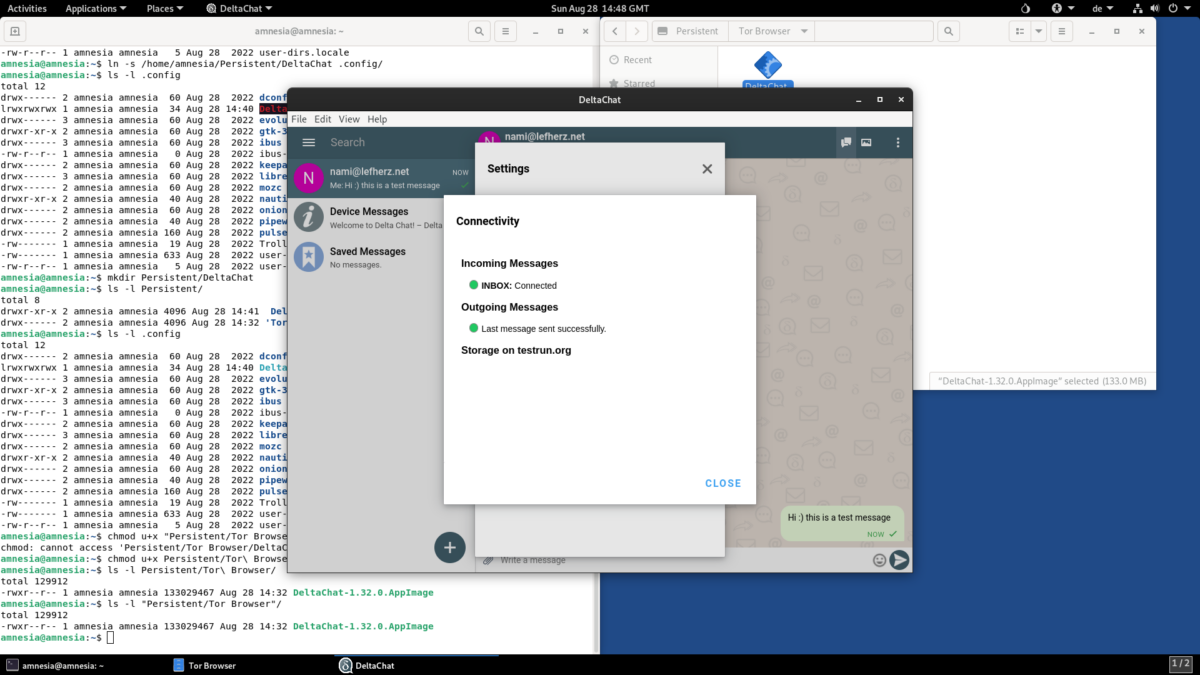
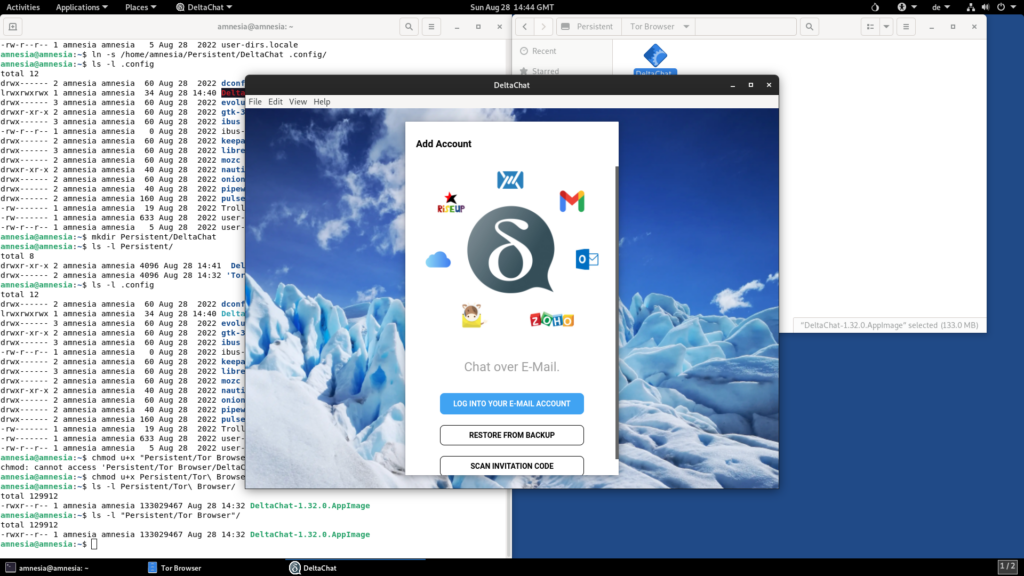
Now we can start Delta Chat. For this, we need to run it in the command line, because it needs the --no-sandbox flag. Just enter the following command (but take care to substitute the version number in the example command for yours):
~/Persistent/DeltaChat-1.46.8.AppImage --no-sandboxAfter some seconds, you should see this window:
Step 5: Use the SOCKS5 Proxy to Connect to Tor
Now we need to add our profile in Delta Chat to start chatting. There are two options: either you have already used Delta Chat on a different device (Option A), or you need to create a new profile (Option B).
Option A: Import Profile From a Backup
If you already used Delta Chat on a different device, it is recommended that you export a backup there, and import it on Tails. (If you would just login to the account with a password, new encryption keys would be generated, and you could run into problems. If you run into trouble, exporting a backup on one device and importing it into the other device should fix it.)
As soon as the backup file is in your Tails system, you can select “I already have a Profile” and “Restore from Backup”, to select the file and import it.
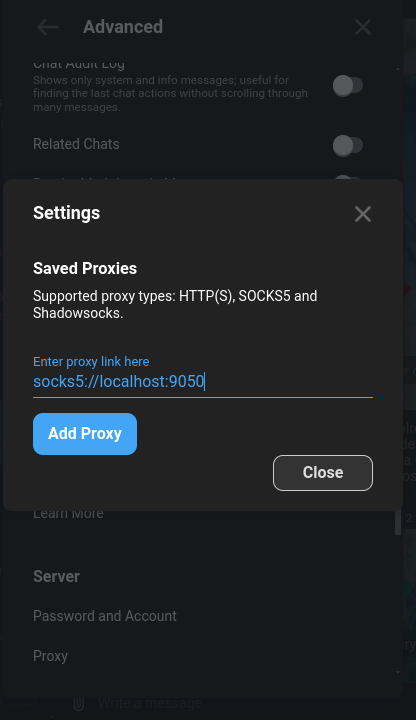
Now you just need to configure it to connect to tor. Tails offers a local SOCKS5 proxy which any application can use to connect to Tor. You can add it in the proxy menu, which you can find in the settings under “Advanced > Server > Proxy”. In the proxy menu, enter socks5://localhost:9050 as Proxy, and click “Add Proxy”; it will try to connect. If it works, you are set to use Delta Chat on Tails!
Option B: Create a New Profile
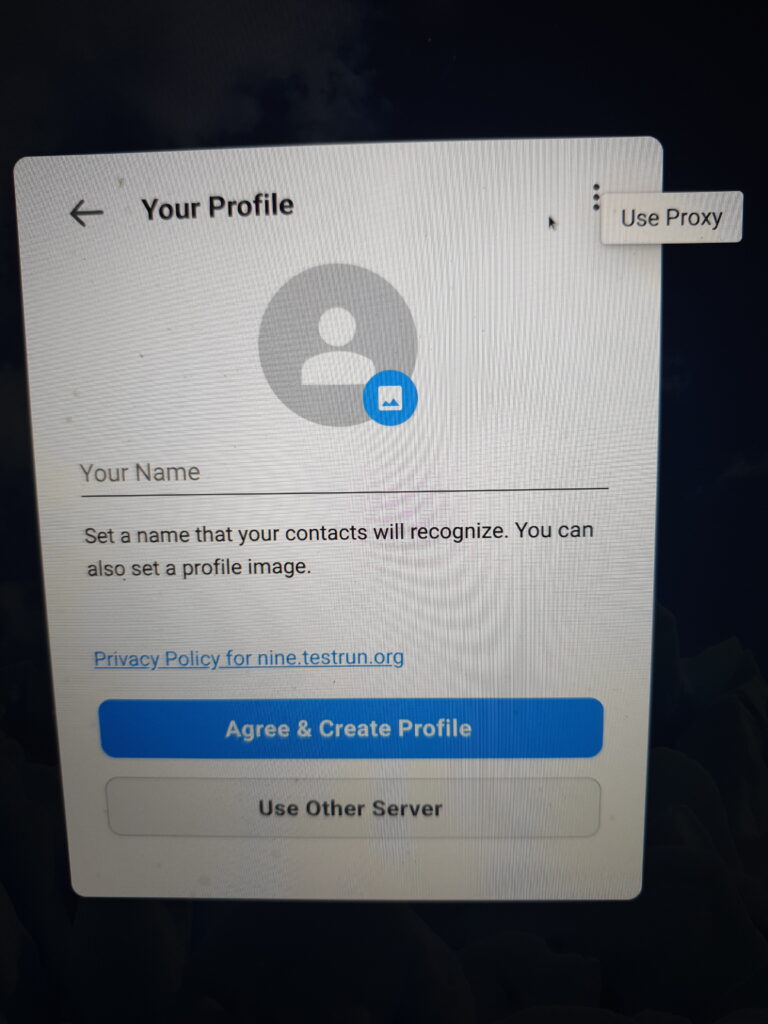
If you don’t have an account yet, don’t worry – we will create one on an open-signup chatmail server. To do that, click Create new profile in the start screen, and then open the Proxy menu in the top right:
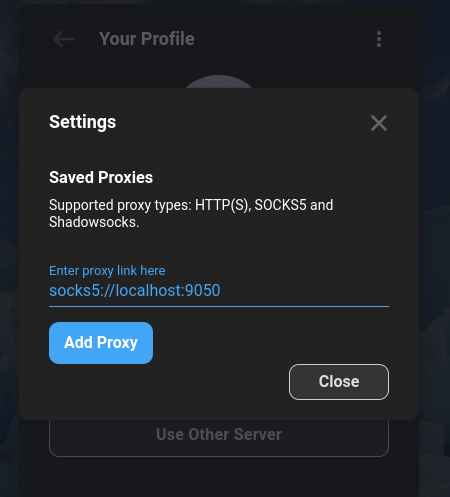
Now we need to configure Tor. Tails offers a local SOCKS5 proxy which any application can use to connect to Tor. For this, enter socks5://localhost:9050 as Proxy, and click “Add Proxy”, then “Close” to proceed with the profile creation:
When you click “Agree & Create Profile”, it will try to connect to Tor. Then it should start downloading your most recent messages. Now you can start using Delta Chat!
Bonus: Add a Friend Through QR Code Scanning
Now that you know how to do it, you can help a friend setting it up. To add a friend, scan their QR code, or let them scan yours. This way you verify each other as contacts and protect yourself from MITM contacts.
Of course, with a Tails stick you don’t always use a laptop with a webcam; sometimes it will just be the old desktop PC of someone’s grandparents. But you can still add them by sending them an invite link via another channel. Note that you both need to be online at the same time for this to work, otherwise it takes a bit longer until you can write to each other.
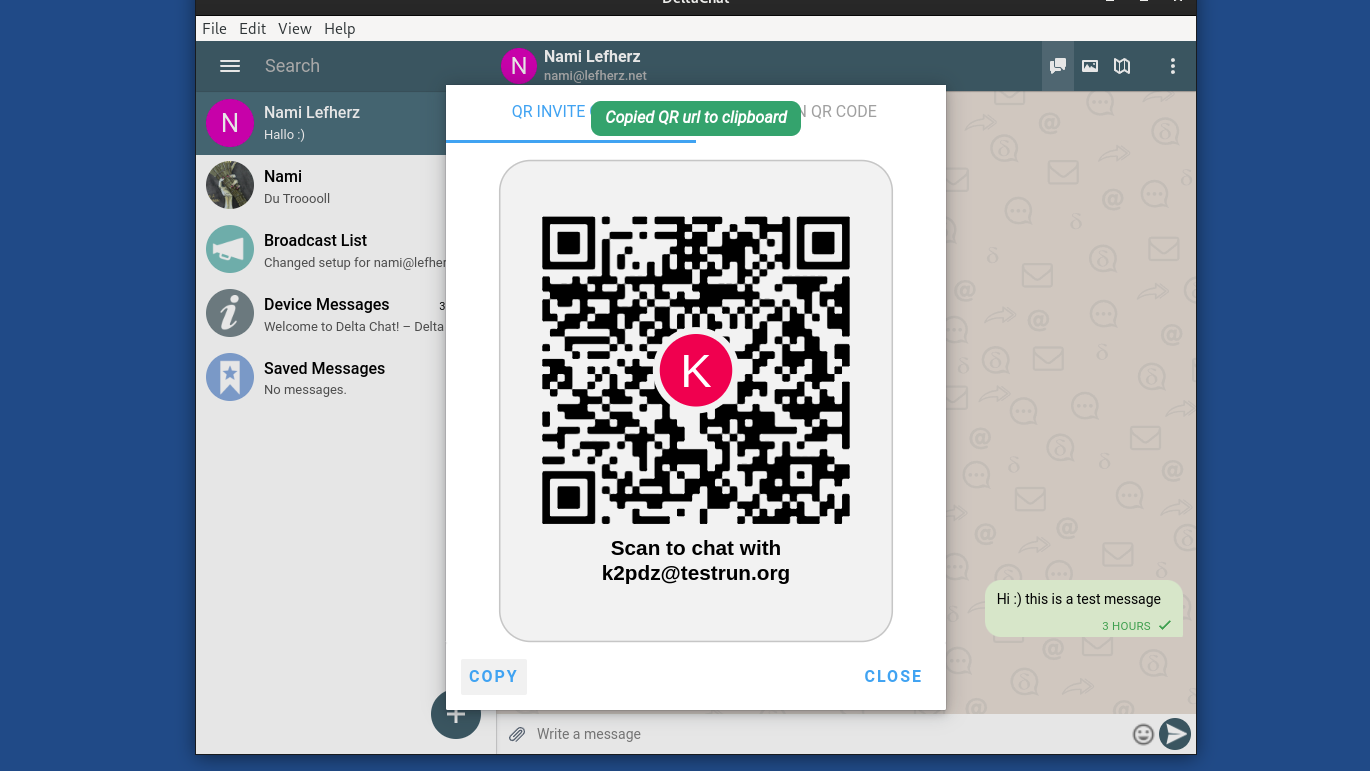
In the QR menu, you can just click on “copy to clipboard”. Then you can send the invite link to your friend, preferaby via a secure channel. It should look like this: https://i.delta.chat/#D1545124C8F9825871236B683E4D4F7310848F27B&a=k2pdz%40testrun.org&n=&i=x0GwuzgeZt_&s=nxWjM_8Vf6e
Now they can also go to their QR menu, and paste the verification code there:
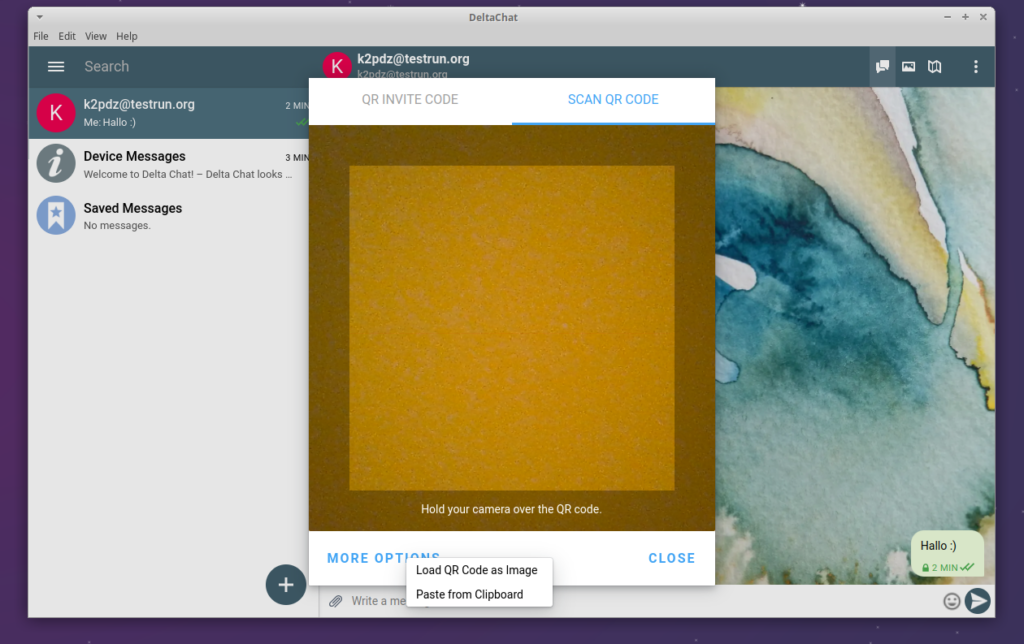
Then the verification process starts. It can take a minute or so, until the verification confirmation appears on both sides:
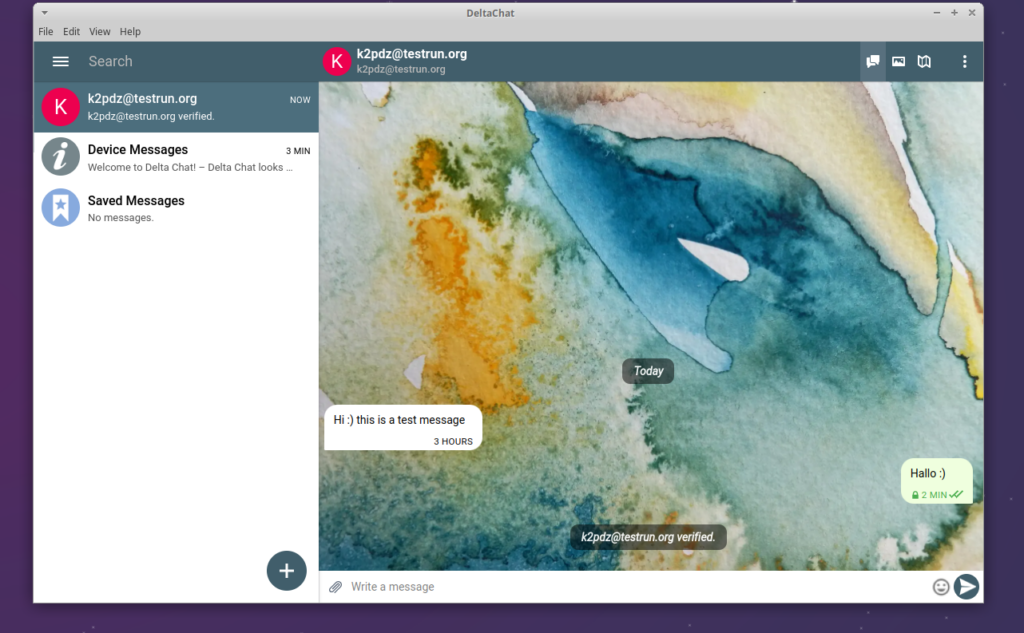
Voilà – that’s it! Now you can be sure that your communication is end-to-end encrypted.
A New Delta Chat Version is Out – How Can I Upgrade?
More or less every two months, the Delta Chat community publishes a new version of the desktop client. You don’t have to update every time, but with upgrading you get all the new features and bug/security fixes, so it is recommended. Also, if everyone uses the same version, the app behaves similarly for them, so you can avoid bugs for others if you update regularly.
To upgrade, follow the following steps:
- Close Delta Chat, if it is running
- Download the most recent .AppImage version from https://get.delta.chat
- Move it to the “Persistent” directory
- Mark it as executable with:
chmod u+x Persistent/DeltaChat*.AppImageNow you can just delete the old version, and launch the new .AppImage with a double click. Voilà!
The problem with Delta Chat is that it is not anonymous. Uses E2EE, but is not anonymous.
I disagree – you can create an account on @nine.testrun.org without supplying any user data; and with this article, Tor hides your IP address. That’s pseudonymous – as anonymous as it gets.
And if you want to switch pseudonyms, just create a new account – voilà. I don’t see the problem.
The link to persistat storage has changed:
[old] https://tails.net/doc/first_steps/persistence/
[new] https://tails.net/doc/persistent_storage/
Thanks for the hint!